Saturday 23 May 2020

Redstone [1.15.2+]


There are a few important concepts to keep in mind with Redstone.

In general, there are two types of redstone blocks:
  • power providers, such as redstone blocks (RedstoneBlock), buttons, levers, daylight sensors
  • power consumers, such as redstone lamp (RedstoneLampBlock), DoorBlock, NoteBlock
Some blocks are both, such as redstone torch and redstone repeaters.  

Power providers

Power providers can provide power to other blocks in two ways:
  1. “Weak power” – every block adjacent to the power provider is powered.  For example – in the picture below, when the lever is on, all adjacent lamps (south, north, west, east, up, down) will turn on.
  2. “Strong power” – when the power provider is attached to a suitable block, it causes that block to provide weak power to all of its neighbours.  For example – the button provides strong power to the stone block, and the stone block provides weak power to the adjacent lamps.

Weak power - when activated, the lever provides weak power to the adjacent lamps (in this case north, south, east, west)


Strong power - when activated, the button provides strong power to the stone it's attached to.  The stone then provides weak power to the adjacent lamps.

The amount of power provided is from 0 (no power) to 15 (max power), using the following Block methods:

getWeakPower(BlockState blockState, IBlockReader blockAccess, BlockPos pos, Direction side)
For the example in the picture below:
RedstoneBlock.isProvidingWeakPower(minecraft:redstone_block, world, redstone blockpos, EAST)
When this method is called for the redstone, it returns the weak power level (i.e. 15) it is providing to the adjacent lamp.
EAST means that the redstone is to the EAST of the lamp.
pos and state are the position and state of the redstone, not the adjacent lamp.

Redstone block provides weak power to the lamp

getStrongPower(BlockState blockState, IBlockReader blockAccess, BlockPos pos, Direction side)

For the example in the picture below:
AbstractButtonBlock.isProvidingStrongPower(
  minecraft:wooden_button[facing=east,powered=true], world, 
  button blockpos,  EAST)
When this method is called for the button, it returns the strong power level (i.e. 15) it is providing to the adjacent stone block.
EAST means that the button is to the EAST of the stone
pos and state are the position and state of the button, not the adjacent stone.

Button provides strong power to the stone.  This will cause the stone to provide weak power to all of the stone's neighbours.

canProvidePower()
– return true!

Optional methods that can help you tweak your block’s behaviour

canConnectRedstone(side)
- this side is a power output and redstone wire will connect to it.  (Note- the Javadoc for the method says "input or output" but actually it's strictly for output only).

shouldCheckWeakPower(IBlockAccess world, BlockPos pos, EnumFacing side)
This method is called when Forge wants to know the power level of this block  Actually it is named backwards!  A block which can be strongly powered (eg by an attached lever or button) should return true here.  This lets you override the vanilla assumption that a block can be strongly powered if (and only if) it isNormalCube().

  • If you return true: Forge checks whether this block is being strongly powered by any of its neighbours.  If not, the power level is zero.
  • If you return false: Forge instead checks whether this block itself is generating weak power.

Power consumers

A power consumer is a block which reacts to nearby power providers.   The propagation of power is by “pull”, not push – i.e. The consumer is responsible for requesting information from its neighbouring providers, not the other way around.  It usually does this in one of two ways-

  1. For non-direction blocks such as Redstone Lamp-
    a. World.isBlockPowered(pos)  for an on/off answer; or
    b. World.getRedstonePowerFromNeighbors(pos) if they need to know the strength [0 – 15]
  2. For directional blocks such as Redstone Torch or redstone repeater-
    a. World.isSidePowered(side) for an on/off answer; or
    b. World.getRedstonePower(side) if they need to know the strength [0-15]

The typical sequence is as follows, with example picture below.

  1. An event occurs which means the redstone power needs to be recalculated.  In many cases, this is caused by a change in the power provider – for example the user pushes the BlockLever -> onBlockActivated(), or the user smashes the BlockLever -> breakBlock() or similar.  The block method will typically then call world.notifyNeighborsOfStateChange().
  2. All neighbouring consumers (such as the Redstone Lamp) will then call world.isBlockPowered(BlockPos) with their own blockpos to discover whether they are being powered, either weakly or strongly.  This check usually happens in onBlockAdded, onNeighbourBlockChange, and updateTick
  3. The call to World.isBlockPowered for RedstoneLampBlock will then check its neighbours one by one (in this case- the unattached lever, and the stone):
    a. Check if the neighbour is providing weak power (the unattached lever).
    b. Check if the neighbour can be strongly powered (yes - the stone), and if so, check if the stone has any adjacent blocks which are strongly powering it (the button attached to the stone).
  4. The RedstoneLampBlock will then change its state/ perform some action as appropriate depending on whether it is being powered or not.
If the block needs to know the strength of the signal, it will use getRedstonePowerFromNeighbors() instead of isBlockPowered().

The glowstone can be powered by weak power from the lever, or alternatively the strong power from the button can make the stone emit weak power to the glowstone.

Comparators

Comparators function slightly differently from other redstone.  The input to a comparator might be from a block that is two positions away with an isNormalCube() in between – for example the comparator senses the level of water in the cauldron, with a stone block inbetween.

The comparator senses the cauldron water level from two blocks away.

To create your own comparator (ComparatorBlock is the only vanilla example), you should implement
getWeakChanges()
 - return true.  This ensures that your comparator will be informed of a change two blocks away, instead of only for adjacent blocks.


Blocks which can be used as the input for a redstone comparator (eg CauldronBlock) should implement the following methods·

hasComparatorInputOverride() 
return true

getComparatorInputOverride(World worldIn, BlockPos pos)
return the value [0..15] to be used by the comparator


Some notes about server/client and IBlockReader


  • You may have noticed that the most important redstone methods (eg isProvidingWeakPower() and isProvidingStrongPower()) give you an IBlockReader instead of a World.  This poses a few restrictions on the methods you can run in there.  Most importantly, it generally means that you must rely on stored power level information rather than trying to calculate it from adjacent block power levels.  Vanilla usually stores the power level in the blockstate, for this reason.  The major exception is the comparator, which uses a TileEntity to store the power level (and retrieves this information during the call to isProvidingWeakPower()).  I think this is probably done for a good reason, eg to stop infinite loops from two adjacent blocks calling each other recursively, or perhaps to make sure that the redstone propagates the same way regardless of which order the neighbour blocks update in.
  • Most of the methods relevant to redstone run on the server only - for example updateTick(), onNeighbourBlockChange() - calculation of signal strengths and propagation of power is done on the server only.
  • If your client side needs to know about redstone signal strength for rendering your block correctly, you need to use some way of communicating it to the client.  Vanilla usually does this by storing the power level as metadata (RedstoneWireBlock), or sometimes by changing the block (eg RedstoneLampBlock).  These are automatically synchronised from server to client. 
  • You might think that you could change the block's appearance during render using getModelData to query the redstone power based on the block's neighbours. Unfortunately this doesn't work.  The reason is that this methods is provided with an ILightReader instead of a World; block rendering is multithreaded and is performed on a cached copy of the world, which only stores some of the information.  This cached copy is accessed through ILightReader and gives no direct access to weak power methods.  You need to store the power level in blockstate property instead.  
  • As an alternative, you can attach a TileEntity to the block - the TileEntity is rendered every frame in the client thread - it has a reference to World which you can use to access all the redstone power methods also on the client side.  Although you could use this trick to access World during a call to getModelData I wouldn't recommend it, because this might lead to the rendering thread accessing the same objects as the client thread without any synchronisation, which is usually a recipe for disaster (i.e. crashes and other weird glitches that are very hard to debug).

Further information

For some more useful background information about redstone devices, see here.  (NB the terminology he uses for "weak" and "strong", "powered", "indirect" doesn't really match the Forge conventions).

Sample Code
Some working examples to illustrate these concepts.


Tuesday 19 May 2020

Minecraft By Example

In parallel with this blog, I created a tutorial project MinecraftByExample.
The purpose of MinecraftByExample is to give simple working examples of the important concepts in Minecraft and Forge. If you're anything like me, a good code example is worth several screens of waffling explanation, and can very quickly explain the key concepts. I also find it much easier to adapt and debug something that already works, than to have to synthesize something from scratch and spend hours trying to discover the missing bit of information I didn't know about.
Each example is split up to be totally independent of all the others. The only part of the code which is common to more than one example is the MinecraftByExample class.
The topics covered are:

Blocks


  • MBE02 - a block with a more complicated shape


  • MBE03 - two types of blocks which vary their appearance / shape:
a block (coloured signpost) with multiple variants- four colours, can be placed facing in four directions


a block (3D Web) with multiple parts (multipart) similar to a vanilla fence.


  • MBE04 - dynamically created block models
    a camouflage ("secret door") block which dynamically changes its appearance to match adjacent blocks - uses IBlockModel.getQuads(), ModelBakeEvent, IForgeBakedModel and IModelData

an "altimeter" block which shows the block altitude (y coordinate) on the side in digital display - as camouflage block but uses programmatic generation of quads 


  • MBE05 - multilayer block (lantern block with transparent glass) with animated flame texture


  • MBE06 - several different types of block which use redstone


  • MBE08 - how to add a creative tab for organising your custom blocks / items

Items


  • MBE11 - an item with multiple variants - rendered using multiple models and multiple layers

  • MBE12 - an item that stores extra information in NBT, also illustrates the "in use" animation similar to drawing a bow

  • X MBE13 - customise Mining behaviour of Blocks and Items - several test classes that show how mining works


  • MBE15 - a chessboard item with 1 - 64 pieces; uses ItemOverrideList.getModelWithOverrides(), IBlockModel.getQuads() and onModelBakeEvent()

TileEntities

  • MBE20 - using a tile entity to store information about a block - also shows examples of using NBT storage

  • MBE21 - using the TileEntityRenderer to render unusual shapes or animations

Containers (Inventories)

  • MBE30 - a simple container for storing items in the world - similar to a Chest

  • MBE31 - a functional container such as a Furnace or Crafting Table


  • MBE32 an item (bag of flowers) which can store other items inside it.  Also shows how to use Capability.


Recipes (Crafting/Furnace)

  • MBE35 - some typical example crafting recipes and furnace (smelting) recipes

Commands

  • MBE45 - custom commands

Particles - particle effects

  • MBE50 - shows how to use vanilla Particles; also how to generate your own custom Particles

Network

  • MBE60 - send network messages between client and server

Capabilities

  • MBE65 - Adding a capability to objects (A Capability is a way to attach information and behaviours to minecraft objects) 

Testing tools

  • MBE75 - a tool to help you automate testing of your classes in-game.

Entities and Models

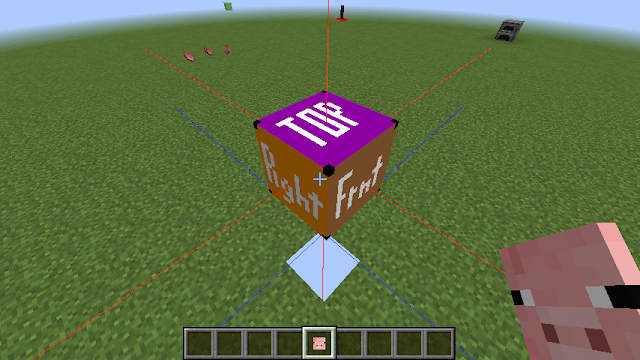
  • MBE80 - Shows the basics of Models (eg PigModel), model parameters adjustable in real time using commands


  • MBE81 - Two examples of projectile entities: a) a simple thrown projectile similar to a snowball; b) a boomerang- which follows a more-complicated flight path


Monday 13 April 2020

Baking models [1.14.4+]

The conversion from block model json files into BakedModels occurs in several steps.

The two major stages are:

  • UnbakedModels are created from the model files, storing information about the shapes in the model.  The vanilla examples of interest are: BlockModel (simple), VariantList (model chosen by blockstate), Multipart (model chosen by selectors)
  • BakedModels are created from the Unbaked models, converting the shape information into a collection of Quads to be rendered.  For block and item models, the individual texture files in the UnbakedModels are also stitched together into a single texture sheet, and the appropriate texture coordinates for each quad are automatically updated to match.


Example of stitched texture sheet appearance

Vanilla classes of interest

ModelManager
ModelBakery
IUnbakedModel (BlockModel, Multipart, VariantList)
IBakedModel (BakedModel, SimpleBakedModel, WeightedBakedModel, BakedItemModel)

BlockModelShapes
BlockModel

TextureAtlasSprite
ItemModelGenerator
AtlasTexture
Stitcher

Forge extensions of interest

ModelLoaderRegistry
OBJModel
OBJLoader


Further information

Blockstates and BlockModels


Item Rendering [1.14.4+]

Rendering items is a bit complicated because there are a number of different places they can be seen:
  • In the Inventory (also in the Speedbar overlay) – referred to in Vanilla code as a GUI item (graphical user interface) "gui"
  • Equipped (held in the player’s hand) – in first person view ("firstperson") or third person view ("thirdperson").
  • Dropped (on the ground "ground")- contained within an EntityItem
  • On a player's head (helmet inventory slot)- "head"
  • In a picture frame ("fixed")– contained within an EntityItemFrame
In addition to this,
  • Most Items which are also Blocks are rendered in 3D (eg TNT), which uses a rendering model generally the same as the Block.  This type of item is usually an ItemBlock.
  • If fancy graphics are enabled, 2D Items have thickness when dropped and also slowly rotate.
  • There are several flags which affect the display of items such as bobbing and rotation when dropped.
  •  ItemStack (multiple items/blocks) render with a number in the GUI overlay and as a pile of minicubes when dropped.

The pictures below show these various different renders:

Item (Pickaxe) and 3D Block (TNT) rendered into the GUI ("gui")

 Fancy graphics enabled.
GUI items (red): Item (pickaxe),  3D Block (TNT), 2D Block (Bed), multiple blocks (Dirt)
Equipped Item (pickaxe blue circle);
Dropped Item/EntityItems (purple):  Item (Pickaxe), 3D Block (TNT), 2D Block (Bed), multiple blocks rendered as minicubes (Dirt)

Fancy graphics disabled.
 Dropped Item/EntityItems (yellow):  Item (Pickaxe), 2D Block (Bed)

Equipped Item - first person view: 3D block (TNT)

Equipped item - third person view: 3D block (TNT)


Items rendered in frames - rendered as per EntityItem: Item (pickaxe), 2D Block (bed), 3D Block (TNT)
Minecraft deals with all these different situations as follows:
  1. Each item has a JSON Item Model file which defines the model used for rendering the item.  This falls into one of several categories:
    a) The model uses one of the 3D block models as a base; or
    b) A "2D" model (with optional thickness) is generated from an item texture (see ItemModelGenerator for the vanilla code which does it); or
    c) for a number of predefined hard-coded items (chests, compass, clock, banner, skull), the rendering is hard-coded in render classes.
  2. The JSON model also defines an ItemCameraTransform for one or more of the different ways an item might be viewed (i.e "gui", "firstperson", "thirdperson", "head", "fixed", "ground").  Each ItemCameraTransform consists of translation, rotation, and scaling information, which is used to position and size the item correctly when rendered in a particular view.
This link describes the structure of the JSON Item Model file (see the Item Models section halfway down).

Further information


The appearance of an item can be modified by code in a number of ways:
  1. Autogenerated (2D items) are built up in layers: the JSON file can specify a texture for layer0, another texture for layer1, and so on.  See example of the spawn egg below. Layers 0 - 4 are permitted in the code, although vanilla models use at most layer0 and layer1.  During auto-generation, the "tintIndex" flag for each quad within a layer is set to the layer number; for example the spawn egg consists of two layers as shown below.  When the item is rendered, layer 0 is rendered first, then layer1, then layer2, etc.  Item.getColorFromItemStack(stack, layer) is called to determine what the colour multiplier for each layer should be.  This allows a single item model to be rendered with a variety of different colours, the best example being spawn eggs and potions.  
  2. If Item.hasEffect() is true (typically because it is enchanted) then an animated "glint" effect (called "foil" in the vanilla code) is rendered over the top.
  3. When rendering in the GUI, the number of items and the item damage bar are added as an "overlay".  Item.showDurabilityBar() and Item.getDurabilityForDisplay() are useful for controlling the appearance of the damage bar.
  4. In the first person view, the position of the player's arm and hence the item are modified. 
  5. The item appearance can be animated when it is being held by a player.
File:excerpt from item/spawn_egg.json
{
    "parent": "builtin/generated",
    "textures": {
        "layer0": "items/spawn_egg",
        "layer1": "items/spawn_egg_overlay"    },


The most interesting vanilla classes to look at for Item Rendering are
  1. ItemRenderer (various methods to render items in different views)
  2. ItemStackTileEntityRenderer for the hard-coded rendering of TileEntityChest, TileEntityBanner, TileEntitySkull

More information

Wiki on item models

Quad Rendering [1.14.4+]

The basic rendering unit for most things you see in the world is the quad.  A quad will have
Position coordinates for its four vertices
Texture information
A facing direction (up, down, east, west, north, south).

Quads can be rendered in a number of different ways depending on the desired effect.  For example, the most significant RenderTypes for blocks are:
Opaque, cutout, translucent (see here)

The way that Quads are rendered is determined by which BufferBuilder they are rendered to.  Eg for block models, vanilla choses the renderbuffer based on the RenderType you have assigned to the block.

At the most basic level, rendering is performed by sending a stream of numbers to a BufferBuilder.  The numbers are grouped into Vertices, and the Vertices are grouped into objects (typically Quads).  For more background information about rendering, see OpenGL eg here 

Depending on what it is drawing, Minecraft uses a number of different VertexFormats.  Some formats have more information than others: for example, when drawing quads without any texture, only Position information is necessary for each Vertex.

The different type of VertexFormats can provide some or all of the following information for each Vertex:

  • Position coordinate (x,y,z)
  • Texture coordinate (u,v)
  • Multitexture (blocklight+skylight lighting)
  • Overlaytexture (Entity colour flash)
  • Colour (r, g, b)
  • Normal (nx, ny, nz) (used for shading of items) 

The required VertexFormat is determined by which BufferBuilder is being drawn to.

In addition, each BufferBuilder has settings which affect how the quads are drawn:

  • Texture sheet (which texture will be drawn on this quad)
  • Lightmap on/off (blocklight+skylight multitexture – see Lighting)
  • Alpha cutoff (for cutout rendering- any pixel with an alpha value less than threshold won’t be drawn)
  • Alpha blending (transparency blending type – controls the appearance of transparent quads)
  • Overlay texturing (similar to blocklight+skylight, but used for making an Entity flash a different colour- eg red when taking damage; or white for a creeper about to explode)
  • DiffuseLighting (uses vertex normal information to perform shading – for items and entities).  Do not confuse this with the diffuse lighting flag used by BlockModels: the concept is the same, but diffuse lighting for block models is applied in code, not using normals.
  • Culling (can you see the quad from both sides, or only from one side?)
  • Writemask (will this quad hide other quads which are drawn after it, even if the other quads are behind this quad in the scene?)
  • Depth test (will this quad check whether it is behind other quads already drawn in the scene?)


Interesting vanilla classes to explore:
BufferBuilder
RenderType
RenderTypes
RenderTypeBuffers
RenderTypeLookup
RenderState
VertexFormat
DefaultVertexFormats

Further information:
Minecraft Lighting
General OpenGL guide - concepts of rendering
Background info on 1.15.2 rendering
Block Rendering

Lighting [1.14.4+]

Minecraft uses three different lighting models depending on what it is rendering:

  1. No lighting - typically for GUI screens.
  2. Item Lighting - uses OpenGL light source models, which are used when rendering items in GUI screens such as inventory slots
  3. World lighting,  which is used for objects which become brighter or darker depending on the amount of light in the world (light from the sky and/or nearby glowing objects).

Item Lighting

Item lighting models two light sources chosen to ensure the rendered items look three-dimensional.  It uses vertex normal information to perform shading, when rendered using an appropriate RenderType.

World Lighting 

The basic world lighting model in Minecraft is made up of two components; Sky Light and Block Light.  Each grid location in the world has a value between 0 - 15 for Sky Light and also a value between 0 - 15 for Block Light.
  1. Sky Light is the light that this block is receiving from the sky, either directly (can see the sky) or indirectly (is near blocks that can directly see the sky).
  2. Block Light is the light that this block is receiving from other light sources nearby (torches, glowstone, etc). 
See here for some more background information.

Vanilla calculates the Sky Light and Block Light for each block.  The basic concepts are:
  1. Each block has an Opacity value which determines how much light it receives from its six neighbours.  A low opacity (eg 1) means the light level decreases by 1 from its brightest neighbour, higher opacity (eg 3) leads to a correspondingly larger decrease.  This calculation is performed separately for both the Sky Light and the Block Light.
  2. Some blocks emit light (eg glowstone) - if this is more than the Block Light coming from its neighbours, the Block Light is set to this emitted value.
  3. If the block has only open sky or transparent blocks above it, its Sky Light is 15.
Two-dimensional example for propagation of Block Light, with opacity = 2.  Sky Light is propagated in the same way.
When the block is rendered, the Block Light and Sky Light values for the block are used to set the brightness.  This is done as follows:
  1. The Block Light and Sky Light values are combined into a single 32-bit integer.  The upper 16 bits contain the Sky Light multiplied by 16, and the lower 16 bits contain the Block Light multiplied by 16.
  2.  this combined "mixed brightness" value, which is interpreted by the renderer as two 16 bit coordinates (i.e. [BlockLight, SkyLight]) for a texture called the lightMap texture - see picture below.  
  3.  When the block face is renderered, it first draws the icon texture then "modulates" it using the appropriate texel from the lightMap, i.e. as given by the [BlockLight, SkyLight] coordinate.  (This process is called Multitexturing).
The lightMap texture (OpenGlHelper.lightmapTexUnit), which has 16x16 texels .  Each texel corresponds to a combination of Block Light and Sky Light.
Why does Minecraft bother to do it this way?  There are at least two good reasons
  1. Treating Block Light and Sky Light separately allows more realistic lighting effects.  Looking at the lightMap texture you can see that Block light imparts a reddish/brownish colour whereas Sky Light does not.  This simulates the yellowy light produced by (eg) a torch.
  2. The lightMap can be updated very easily to change the lighting of the entire scene- for example depending on the time of day (eg full sun, sunset); to create the effect of a flickering torch; or when the player drinks a night vision potion.  This updating is performed by EntityRenderer.updateLightMap().

Face-dependent lighting effects

In addition to the per-block lighting described above, Minecraft can also perform some extra lighting calculations for each block face to increase the realism of the lighting:

1-Direction-dependent face brightness

This method renders the six faces with a different lighting intensity depending on which direction the faces points:
  1. Top face (Ypos) is at full intensity
  2. Bottom face (Yneg) is 50% intensity
  3. Z-side faces (Zpos, Zneg = South, North) are 80% intensity
  4. X-side faces (Xpos, Xneg = East, West) are 60% intensity.
Direction-dependent face brightness: off (left) vs on (right)

This lighting is applied to each face; when the texture is rendered it is multiplied by the "colour" value (in this case a shade of grey).

In some cases an RGB colour multiplier is also passed in by the caller (for example underwater gives blocks a blue tint) which is multiplied by the % intensity described above.

The lighting of the face is also affected by the [BlockLight, SkyLight] mixed-brightness in the usual way.  The diagram below summarises these steps.

Schematic showing how Minecraft applies lighting effects:
(1a) face-dependent intensity and (1b) colour multiplier, then (2) [Blocklight,Skylight] lightmap

2- Ambient Occlusion

Ambient Occlusion is a method for calculating the amount of light shining on a surface based on nearby blocks.  A brief introduction on the approach used by minecraft is here.   Briefly, for each vertex, an average light intensity is calculated from the three adjacent blocks plus the block which touches the face.  In the example below for the red circled vertex this is the three blocks in white plus the block resting on top of the face (not shown).  If all these four blocks are transparent, the "Ambient Occlusion" light intensity will be 1.0.  Each opaque block reduces light received by the vertex - if all four blocks are opaque the intensity will be 0.2.  This "Ambient Occlusion" value is then multiplied by the colour multiplier for that vertex.
The Mixed Brightness for the vertex is calculated as the average of these four adjacent blocks.
 (There are some extra details about whether the corner block is included or not, but you get the basic idea).
 OpenGL applies smoothing when drawing the face, so that the lighting effect is graded smoothly over the face between the vertices.

Ambient Occlusion algorithm.  Diagram adapted from 0fps.


Further Details

When a quad is rendered in the world, a number of different types of lighting effects may be applied:
· A ‘diffuse lighting’ (“shade”) where the brightness is changed depending on which direction the quad is facing.
· A multitexturing brightness: BlockLight+SkyLight
· Ambient occlusion (if enabled): the four corners of the face will be modified to
o    Be darker at vertices where opaque blocks are next to the vertex
o    Use the skylight+blocklight at that corner instead of a uniform value for the entire face
 
The blocklight+skylight is calculated depending on where the face is located:
· Inside the cube = the block itself
· At the edge of the cube: from the neighbour in the direction that the face is pointed (eg east)
The blocklight+skylight is generally calculated as:
· For blocks with isEmissiveRendering() == true, maximum
· For others: the calculated skylight, plus the calculated blocklight (from nearby blocks) or blockState.getLightValue(), whichever is higher.

Interesting vanilla classes to explore

BlockModelRenderer::renderModelSmooth (ambient occlusion rendering)
BlockModelRenderer::renderModelFlat (no ambient occlusion)
ILightReader
LightTexture (the multitexture used for blocklight+skylight)
WorldRenderer::getPackedLightmapCoords
 

Further Information

Wiki about Light
Ambient Occlusion